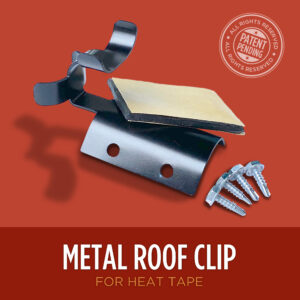
When it comes to ice Dams, gutters that are particularly problematic sometimes require more then one run of heat tape to keep clear passages for water to escape. To maximize the effectiveness of a double-run setup, positioning the two cables optimally is key. The Heat Tape Gutter Separator Clip is designed to position two runs of Ice Dam Heat Tape within the gutter to maximize performance.
$7.95
4220 in stock

The whole point of heat tape is to create channels in ice to let the melting water escape. When it comes to conveying the water away from the source of ice, gutters can often play a key role. Sometimes that requires more then one run of heat tape within the gutter to create an additional channels for water to flow. Using the Heat Tape Gutter Separator Clip makes it extremely easy to get optimal placement of you heat tape within the gutter basin.
“Heat Tape Pro did exactly what I needed it to do. Now I don’t have to worry about water leaking into my house, because I can tell when it’s working by the little light on the end of the cable.”
-Michael P.
Amazon Customer
“This heat tape works as advertised. It was delivered to me fast, and although it’s a little complicated to install, the documentation is good..”
-Shaun D.
Radiant Solutions Customer
“I install thousands of feet of heat tape every year. This is the best stuff I’ve found to protect my customers homes and give them the piece of mind they need.”
-Patrick B.
Professional Installer
Heat Tape Pro has the most comprehensive installation system that works on almost any kind of roof type.
For information about installing Heat Tape Pro on a Natural Slate Roof, Click here.
For information about installing Heat Tape Pro on a Synthetic late Roof, Click here.
See Below
Measuring is not difficult and you can make measurements without going up on your roof or using a ladder if you err on the side of overestimating the distances. Here’s Radiant Solutions Guide to Measuring for Heat Tape, which gives a detailed overview of measuring and some tips and resources, if you think you need it.
Once you have your measurements, you can use our Heat Tape Calculator to help you determine the length of Heat Tape Pro you need, the number of Heat Tape Clips you’ll need, and misc. product considerations.
We are building a hand guide to identify what kind of roof you have and find the clips that can/should be used with that roof-type.
View the Guide Explaining What Clips You Need Here
We have a guide on How to Measure for Purchasing Heat Tape that will help you. Once you have your measurements, you can find our Heat Tape Calculator here.
The short answer is NO. Self-regulating heat cable does not turn itself on and off automatically. To do that you need to put the cable on a switched circuit or outlet or on a controller. Of course, you can also be old-school about it and simply plug and unplug as needed.
“Self-Regulating” refers to the fact that these cables are temperature sensitive. Due to their construction, these cables sense changes in temperature along their entire length, demanding more power as temps fall and less when they rise.
PipeFreeeze Pro™, Pipe Freeze Protection Solution has a built in thermostatic switch, meaning it will turn on and off on it’s own.
Heat Tape Pro™, does not contain a built-in thermostatic controller. We recommend adding the ThermaCord™ Thermostatic controller to turn your Heat Tape PRO to turn the cable on and off with changes in temperature.
Radiant Solutions has the most comprehensive installation system for Heat Tape that exists. We make accessories to install heat tape on almost any kind of roof.
Click here to learn about product specifically for Natural Cedar Roofs
The terms heat cable, heat tape and heat trace are all used interchangeably to described heated cables used to protect pipes from freezing, preventing roof and gutter ice dams from forming and for safeguarding temperature sensitive components.
Other terms we’ve seen used regarding Heat Tape are:
If you are in need of a specific product that is currently out of stock, you can request to be notified when new inventory of product is in stock.
Click Here to complete the Re-stock Notification Form
We generally do not reserve stock for miscellaneous reasons outside our stated inventory on this website. Besides selling on this website, we also Sell our products on Amazon.com – in doing so, we send separate inventories to their warehouse for fulfillment, so you could check inventory of the product you are looking for there.
We are frequently restocking products and the one you need will soon be available. You can make a request to be notified when out of stock items are re-stocked.
Click Here to Submit your information to be notified of a Products Restock
Check out our full list of Frequently Asked Questions on our FAQ Page.
Take a Look at Our Heat Tape Installation Case Studies
Learn a Bit about Ice Dams and How & Why they Form


Find heat tape products & accessories for ice dam prevention and pipe freeze protection.
We may be able to help connect you with a Radiant Solutions Heat Tape installer in your area.
And Product Dimensions
Understand the problems that our products solve and the advantage Radiant Solutions has over our competitors.
Demand is high across the U.S. & installers are needed!
128-Bit encrypted connection
We’re here to help. We are a 35 year old, family-owned, American company who loves to hear from our customers.