10-Pack of Roof Clips for Mounting Heat Tape to Standing Seam Metal Roofs .325″ to .625″.
$24.50

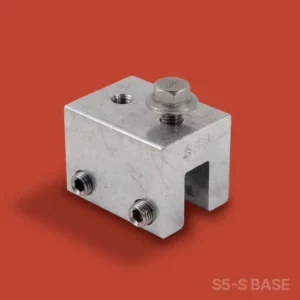
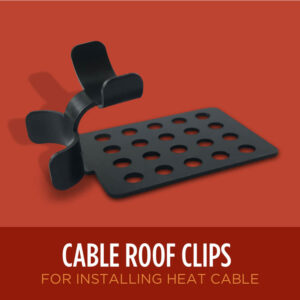
This clip comes in three different sizes in packs of 10. The standing seam clip is designed to provide a strong attachment point for installing heat cable on most common standing seam metal roofs. Please verify the width of your standing seam to determine which clip size you need. The standing seam metal roof clip requires a seam with a minimum height of 1 1/4”. Tools Required: Screw gun, Hex head driver bit(5/16”), Butyl Pads(best method for sealing screws), or Silicone caulk.
“Heat Tape Pro did exactly what I needed it to do. Now I don’t have to worry about water leaking into my house, because I can tell when it’s working by the little light on the end of the cable.”
-Michael P.
Amazon Customer
“This heat tape works as advertised. It was delivered to me fast, and although it’s a little complicated to install, the documentation is good..”
-Shaun D.
Radiant Solutions Customer
“I install thousands of feet of heat tape every year. This is the best stuff I’ve found to protect my customers homes and give them the piece of mind they need.”
-Patrick B.
Professional Installer
The terms heat cable, heat tape and heat trace are all used interchangeably to described heated cables used to protect pipes from freezing, preventing roof and gutter ice dams from forming and for safeguarding temperature sensitive components.
Other terms we’ve seen used regarding Heat Tape are:
Radiant Solutions products, including Ice Dam Prevention products such as Heat Tape Pro and Pipe freeze Prevention products like Pipe Freeze Pro can be purchase here at this website or at Amazon.com.
Heat Tape Pro has the most comprehensive installation system that works on almost any kind of roof type.
For information about installing Heat Tape Pro on a Natural Slate Roof, Click here.
For information about installing Heat Tape Pro on a Synthetic late Roof, Click here.
The short answer is NO. Self-regulating heat cable does not turn itself on and off automatically. To do that you need to put the cable on a switched circuit or outlet or on a controller. Of course, you can also be old-school about it and simply plug and unplug as needed.
“Self-Regulating” refers to the fact that these cables are temperature sensitive. Due to their construction, these cables sense changes in temperature along their entire length, demanding more power as temps fall and less when they rise.
PipeFreeeze Pro™, Pipe Freeze Protection Solution has a built in thermostatic switch, meaning it will turn on and off on it’s own.
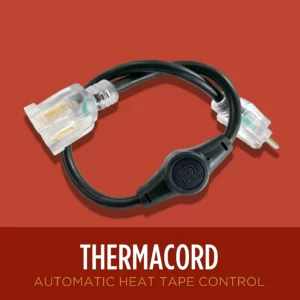
Heat Tape Pro™, does not contain a built-in thermostatic controller. We recommend adding the ThermaCord™ Thermostatic controller to turn your Heat Tape PRO to turn the cable on and off with changes in temperature.
We are a family-owned business with less than 10 employees that has been in business since 2016. Our experience with ice dams goes far beyond that: our founder Steve started a business diagnosing and solving Ice Dam problems on customer houses for almost 35 years.
We have a calculated rate based on the product in your cart if you choose to ship to Canada or Alaska.
More can be found here.
Radiant solutions has developed several accessories and installation components that work well for flat and low-pitch roofs. Installing heat tape on a flat roof often requires more unique considerations than standard serpentine patterns used on pitched roofs.
Check out our Case Studies for examples of Heat Tape installations, including information on flat roofs.
Also refer to the Heat Tape Pro Product Manual for information on flat roof installations of heat tape.
Heat Tape Pro and Pipe Freeze Pro are offered in many lengths from 6-foot up to 150-foot. These products are not designed to be modified, so you should pick the length you need and work with that length. These cables should not be altered and doing so would void any warranty on the product.
We offer heat tape on spools from 250-foot to 1000-foot. These spools are designed to be cut to length, made into multiple cables, etc. Heat Tape on spools needs to be hard-wired into a junction box, or have a power connection plug-in manually added to it for use. It also requires ends to be properly sealed and terminated. When working with Heat Tape on spools, a Licensed Electrician should be utilized to assure proper wiring per regional codes and standards.
Check out our full list of Frequently Asked Questions on our FAQ Page.
Take a Look at Our Heat Tape Installation Case Studies
Learn a Bit about Ice Dams and How & Why they Form


Find heat tape products & accessories for ice dam prevention and pipe freeze protection.
We may be able to help connect you with a Radiant Solutions Heat Tape installer in your area.
And Product Dimensions
Understand the problems that our products solve and the advantage Radiant Solutions has over our competitors.
Demand is high across the U.S. & installers are needed!
128-Bit encrypted connection
We’re here to help. We are a 35 year old, family-owned, American company who loves to hear from our customers.